Cooking with Toti
cookingwithtoti.com/recipes/no-bake-halloween-skull-treats
No-Bake Halloween Skull Treats
Creamy raspberry biscuit skulls with white candy coating, an optional green matcha version, and a spooky cocoa dusting. No baking needed.
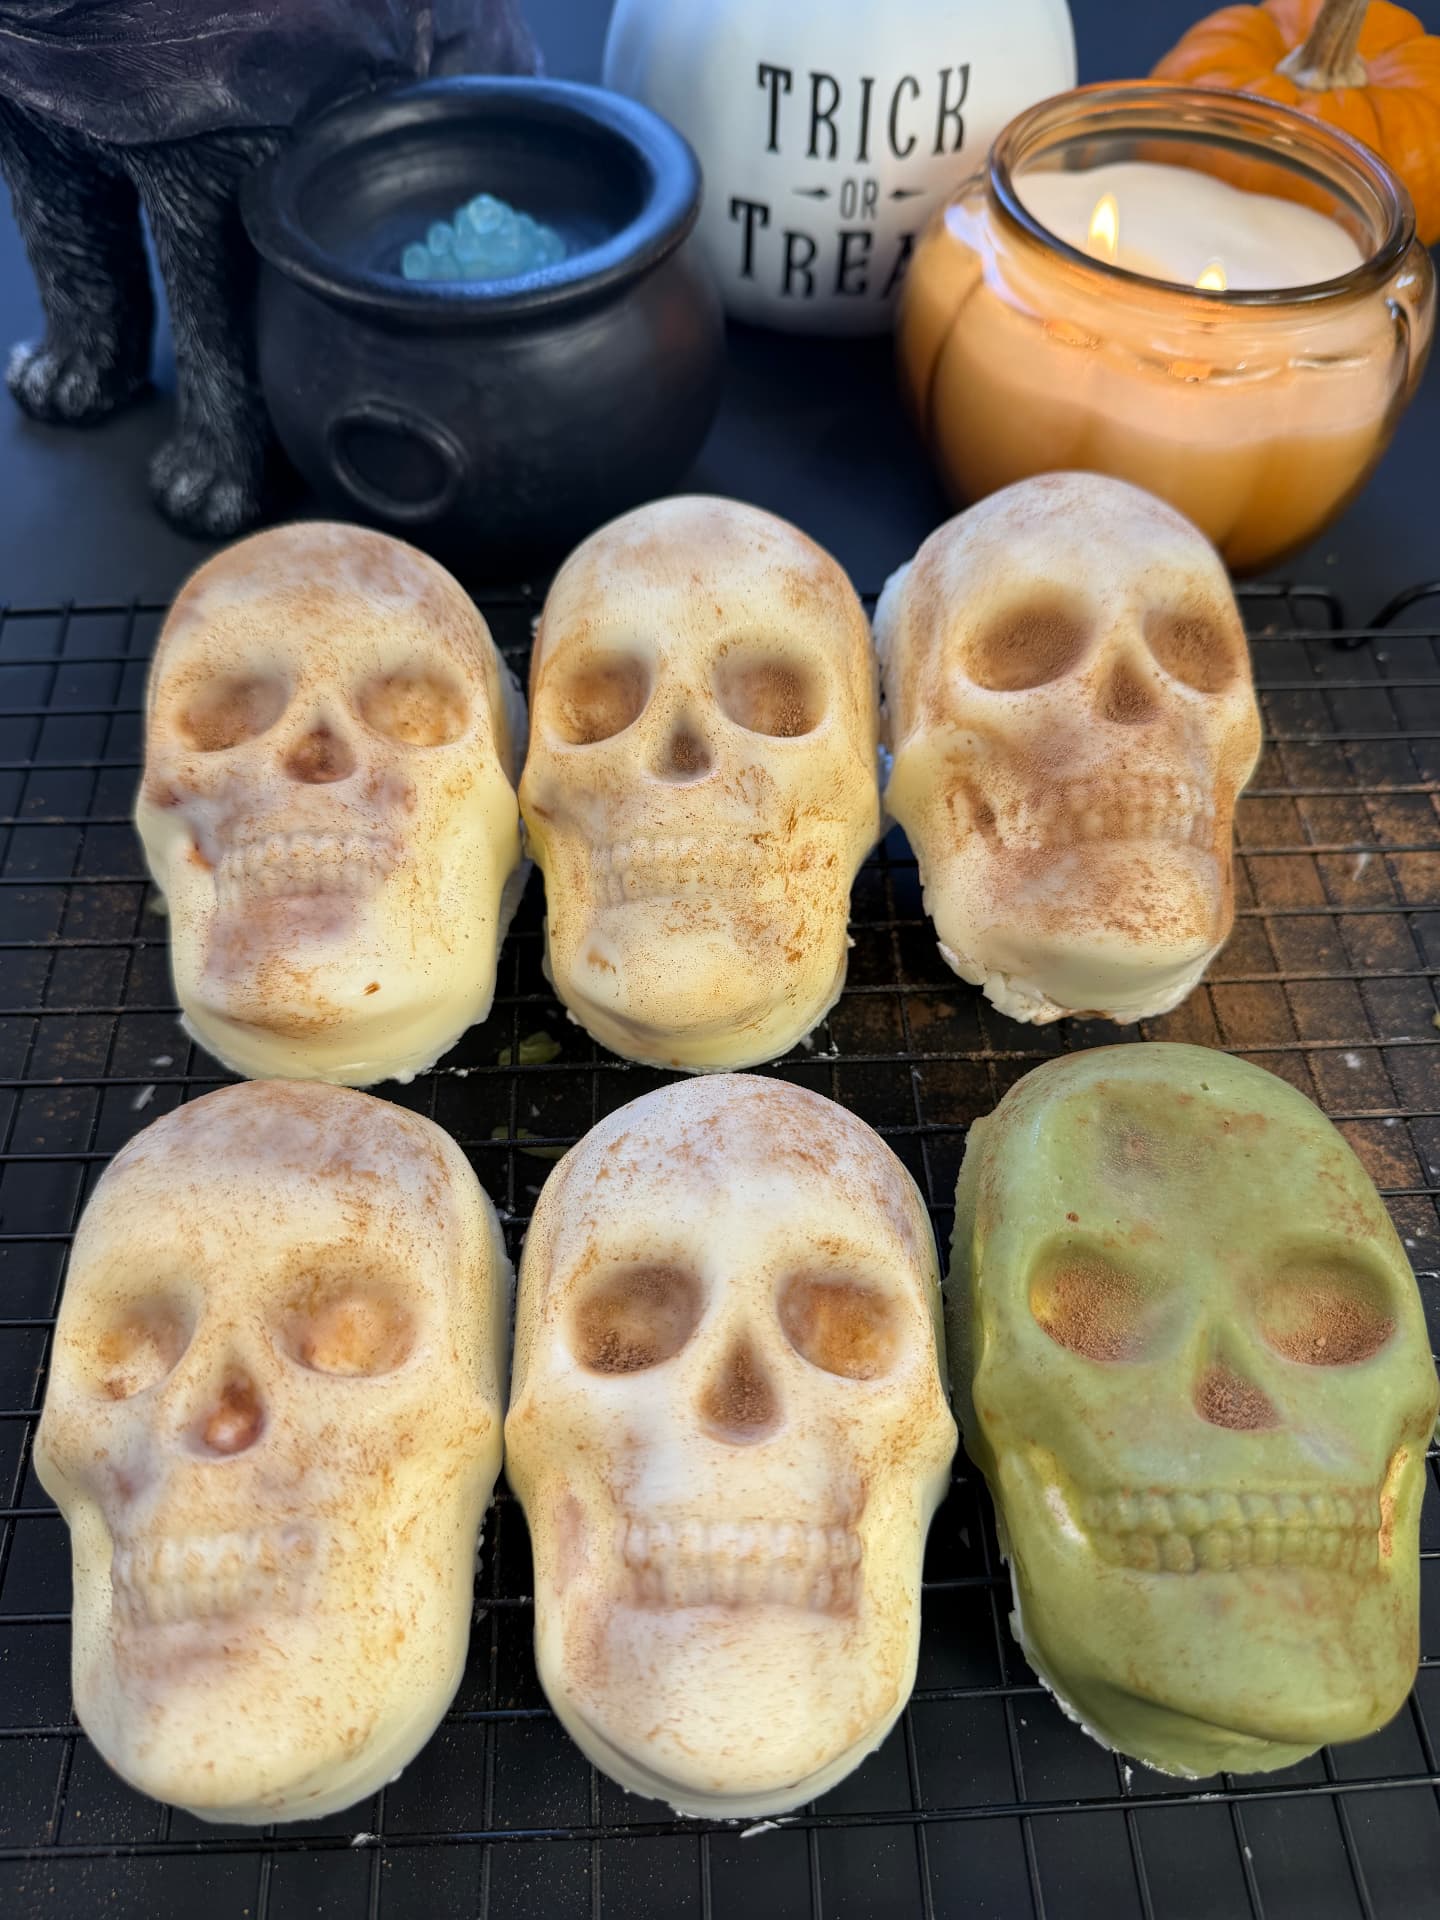
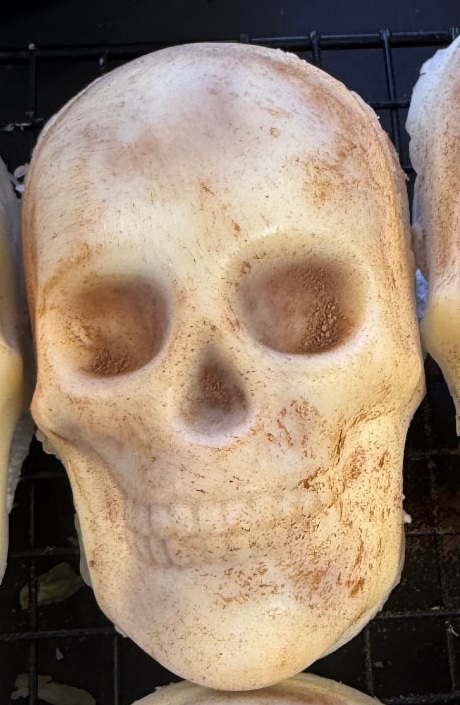
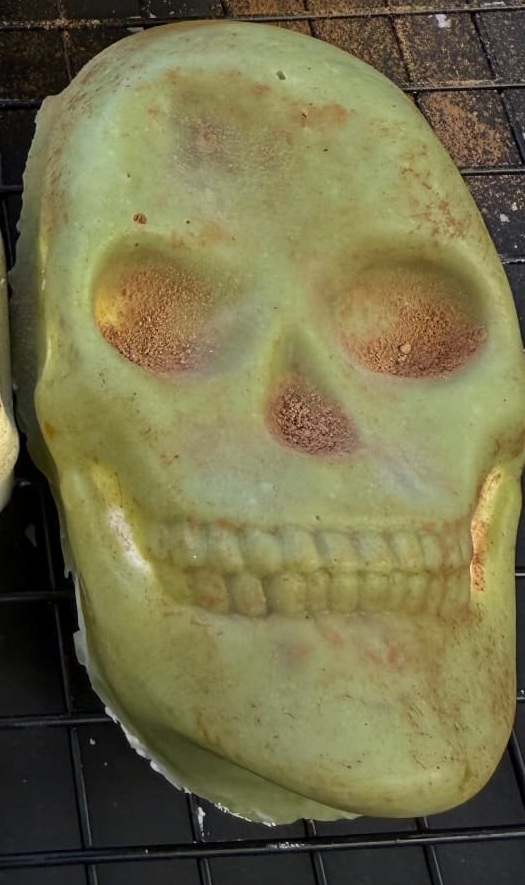
These little Halloween skulls are so fun and surprisingly easy to make. They have a creamy cream cheese filling with sweetened condensed milk, crushed biscuits, and raspberry jam, all covered in a white candy coating. I also made one green version by adding matcha to the coating, then dusted the finished skulls with cocoa powder to give them that old, spooky, dusty look. These are creamy, crunchy, fruity, spooky, and so cute for Halloween.
Save this recipe
I’ll email you a link to keep for later.
More photos
Instructions
Melt the White Coating
- 1
Melt the white candy coating until smooth.
- 2
Using a pastry brush or spoon, coat the inside of each skull mold with a layer of the melted coating.
- 3
Make sure you cover the details of the mold, especially around the eyes, nose, teeth, and edges.
- 4
Place the mold in the refrigerator briefly so the coating can set.
Make the Cream Filling
- 1
In a bowl, mix the softened cream cheese with ½ can sweetened condensed milk.
- 2
Add heavy whipping cream and whip until the mixture becomes creamy and fluffy.
- 3
You can also use prepared whipped topping instead of whipping heavy cream if you want an easier version.
Prepare the Biscuits
- 1
Crush any biscuits or cookies you have.
- 2
They do not need to be completely powdered. A little texture is perfectly fine.
Fill the Skulls
- 1
Once the first layer of candy coating has set, begin filling the molds.
- 2
Add some of the cream cheese mixture. Then add crushed biscuits, a little raspberry jam, and another layer of the cream cheese mixture.
- 3
Do not overfill the molds because you need room to seal the bottom.
Chill
- 1
Place the filled molds in the refrigerator for about 15 minutes.
Seal with More Candy Coating
- 1
Remove from the refrigerator.
- 2
Spread another layer of melted white candy coating over the top to completely seal each skull.
- 3
Smooth it as much as possible.
Freeze
- 1
Transfer the molds to the freezer.
- 2
Freeze until completely firm.
- 3
You can leave them frozen longer if needed — just make sure they are fully set before unmolding.
Unmold
- 1
Once frozen and firm, carefully remove each skull from the silicone mold.
- 2
Work gently around the edges so you do not break the coating.
Green Matcha Version
- 1
For the green skull, simply mix a little matcha green tea powder into the melted white candy coating.
- 2
Add just enough matcha to create the shade of green you want.
- 3
Brush the mold with the green coating and continue with the recipe exactly the same way.
Make Them Look Spooky
- 1
Once the skulls are unmolded, lightly dust them with cocoa powder.
- 2
I like concentrating a little more cocoa around the eyes, nose, teeth, and creases.
- 3
It gives them an aged, dusty, spooky look and makes all the skull details stand out.
Toti’s Tips
- ✓Use a silicone mold so the frozen skulls release easily.
- ✓Make sure the first candy coating layer covers all the little details of the mold.
- ✓Any crushed biscuit or cookie will work.
- ✓Raspberry jam gives the inside a fun red color that is perfect for Halloween.
- ✓Store-bought whipped topping works if you don’t want to whip heavy cream.
- ✓Freeze the skulls completely before unmolding.
- ✓Add matcha to the white coating for a natural green color.
- ✓Dust with cocoa only after unmolding.
Get my free e-book — 7 quick & easy dinners + 3 sweet bonus desserts
The weeknight dinners my kids actually ask for seconds of, plus the sweet treats — with photos from my own kitchen.
Free PDF · Unsubscribe anytime